Sticky Miso Salmon Bowl is a dinner that fills the kitchen with comfort and warmth. The first time I made it, the glaze started to bubble in the oven, and everyone came running to see what smelled so good. This bowl has everything I love about weeknight cooking. It is simple, balanced, and full of flavor. The mix of miso, honey, and grapefruit creates a bright and savory glaze that clings to tender salmon. If you have tried my classic miso salmon, you will enjoy this version even more. It includes buttery rice, scallions, and crunchy toppings for a meal that always feels complete.
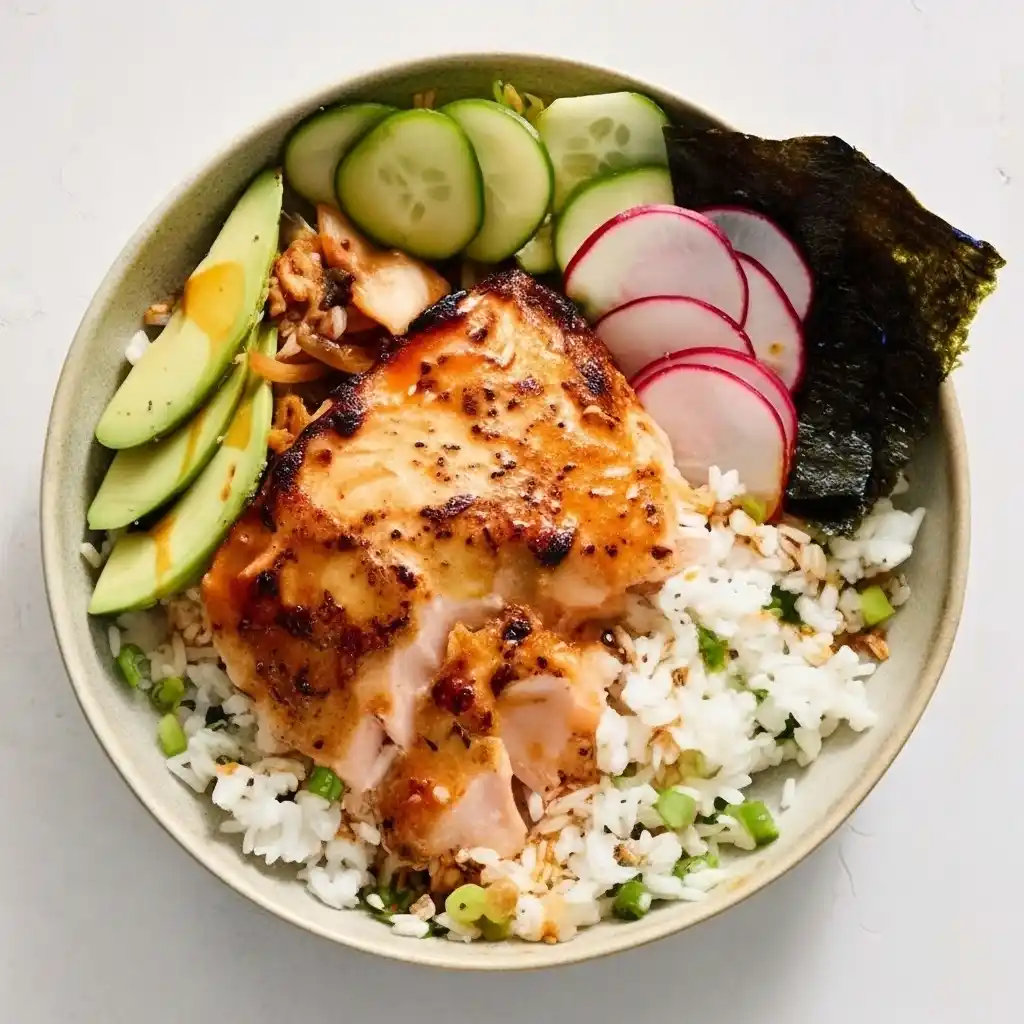
Table of Contents
The Story and Why This Sticky Miso Salmon Bowl Works
Cooking has always been my way of connecting with my family. This Sticky Miso Salmon Bowl does that better than almost any recipe I make. The night I first tested it, my kids watched through the oven door as the glaze turned deep and glossy. That moment taught me that simple food can still feel special.
Why this bowl always works:
- It is simple but memorable. A short ingredient list creates layers of flavor.
- The glaze makes it shine. Miso, honey, and grapefruit come together in a rich, sticky coating.
- The rice adds comfort. Butter and scallions make it soft and flavorful.
- It welcomes creativity. Add avocado, cucumber, or kimchi to make it your own.
This version takes inspiration from Andy Baraghani’s original idea but keeps the process easier for home kitchens. It is quick, comforting, and full of flavor. When the glaze hits the warm rice, the taste feels like a perfect balance of sweet, salty, and fresh.

Sticky Miso Salmon Bowl
Equipment
- medium saucepan with lid
- mixing bowl
- whisk
- foil-lined baking sheet
- spatula or spoon
Ingredients
- 2 cups sushi rice, rinsed until water runs clear
- 3 tbsp white miso paste
- 2 tbsp honey
- 1 tbsp vegetable oil
- 1 tbsp freshly grated ginger
- 2 tsp grapefruit zest
- 1 tbsp grapefruit juice
- 4 skinless salmon fillets (6–8 oz each), patted dry
- salt and pepper, to taste
- 4 scallions, thinly sliced
- 1 tbsp unsalted butter, cubed
- Optional toppings: kimchi, chili crisp, toasted nori, sliced cucumber, avocado, or radish
Instructions
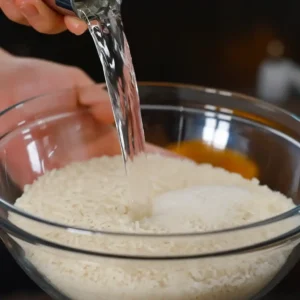
- Rinse the sushi rice until the water runs almost clear. Cook with 2¼ cups of water, then let it steam covered for 10 minutes.
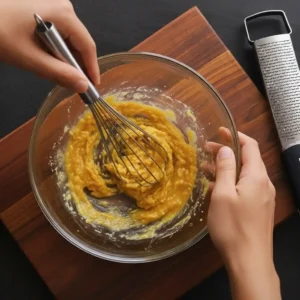
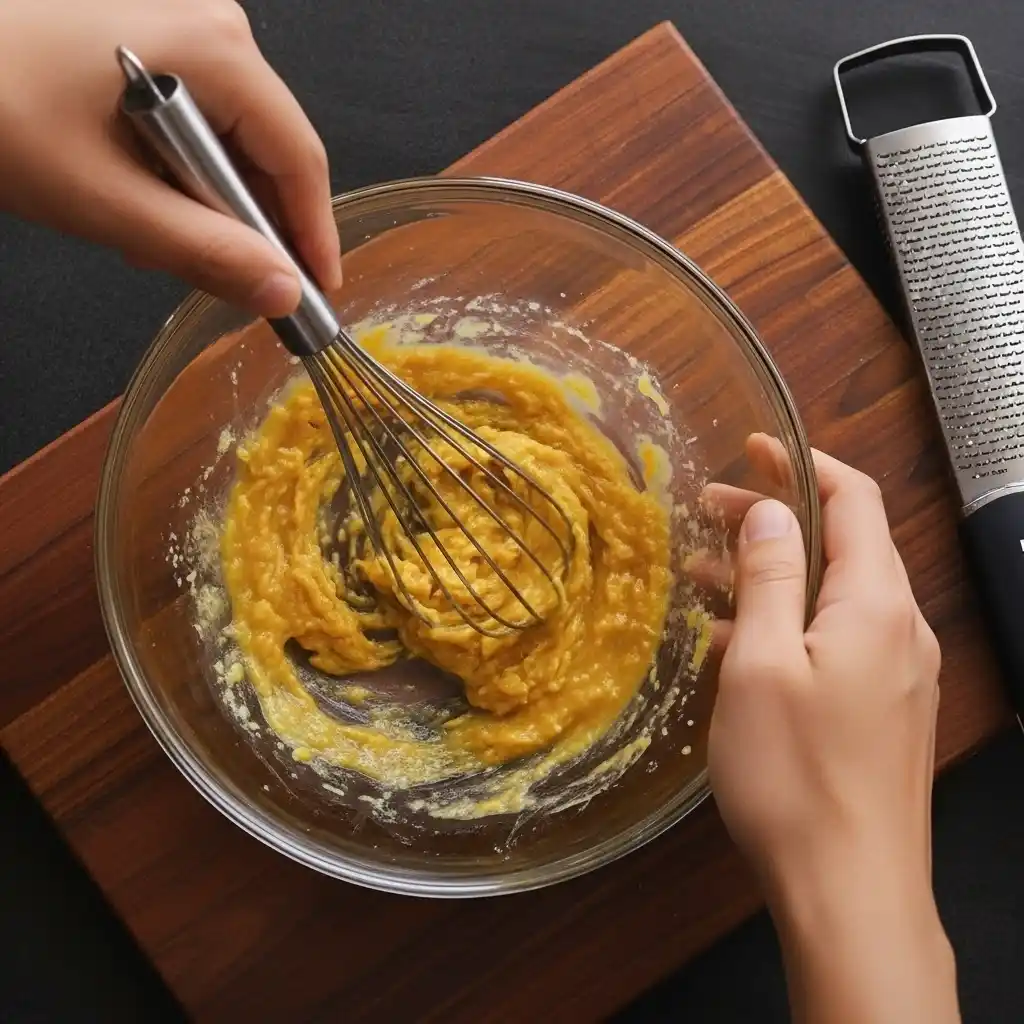
- In a bowl, whisk miso, honey, oil, ginger, grapefruit zest, and juice until smooth.
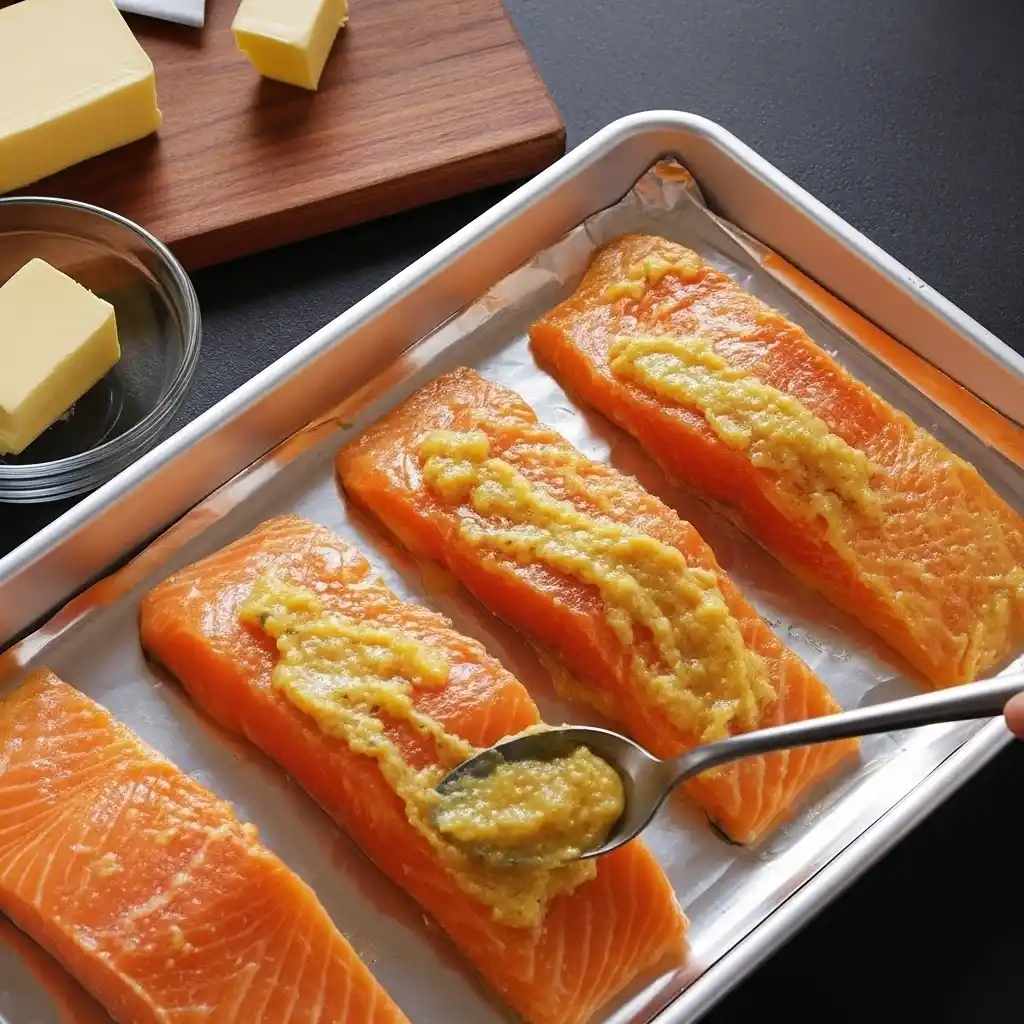
- Season the salmon with salt and pepper, then coat it with the glaze. Let it marinate while the rice cooks.
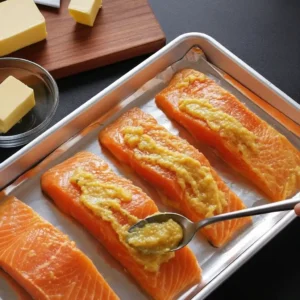
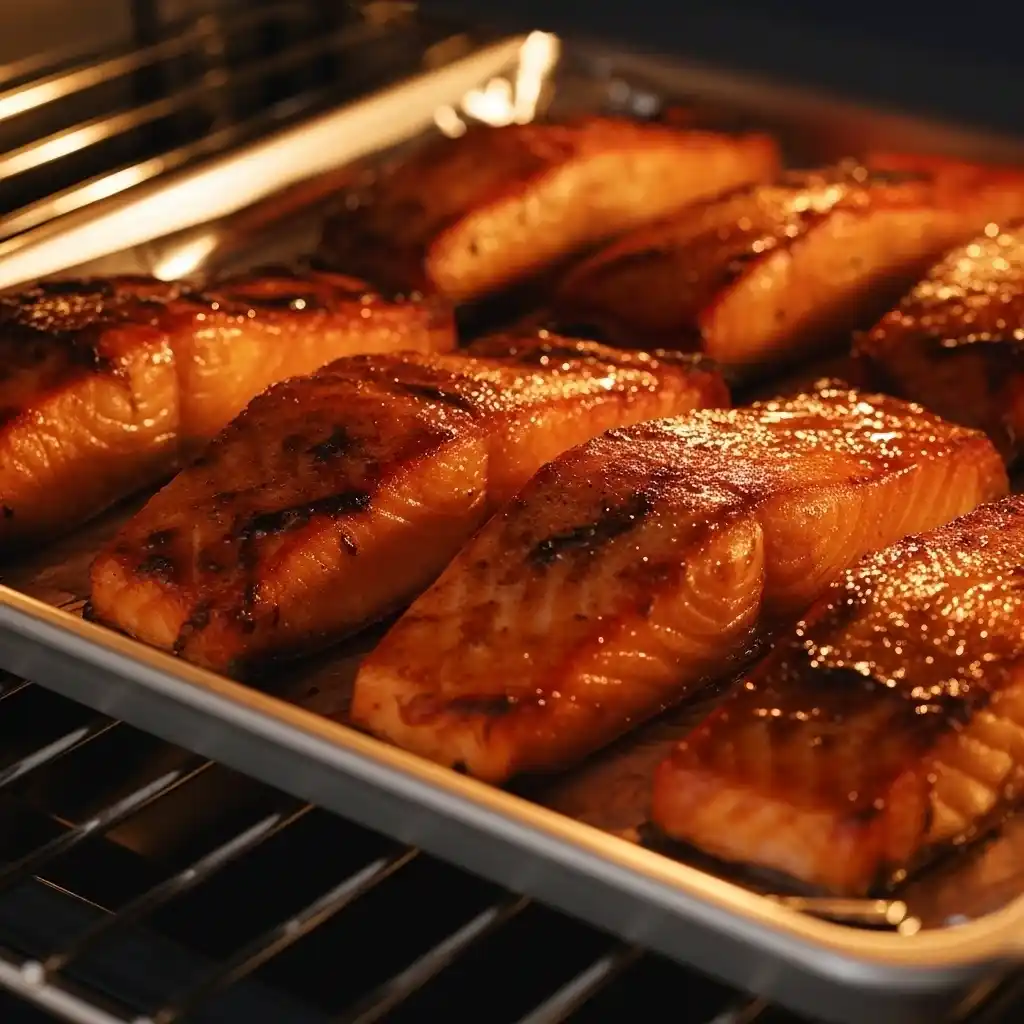
- Place the salmon on a foil-lined baking sheet and spread extra glaze on top. Broil for 5–7 minutes until caramelized and glossy.

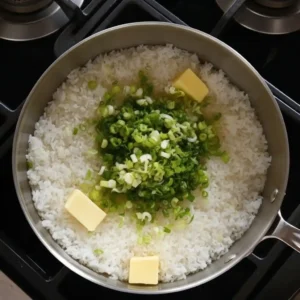
- Stir butter and scallions into the warm rice. Season with salt and pepper, and fluff until soft and fragrant.
- Spoon the rice into bowls, top with the sticky miso salmon, and add your favorite toppings.
Notes
- Substitute grapefruit with orange or lime juice for a softer flavor.
- Store leftovers in an airtight container for up to 3 days.
- For a quicker version, use the air fryer method from my air fryer miso salmon recipe.
Nutrition (per serving)
- Serving Size: 1 bowl
- Calories: 560
- Sugar: 14g
- Sodium: 820mg
- Fat: 22g
- Saturated Fat: 5g
- Unsaturated Fat: 16g
- Trans Fat: 0g
- Cholesterol: 80mg
- Carbohydrates: 45g
- Fiber: 2g
- Protein: 38g
Ingredients and Flavor Layers for the Sticky Miso Salmon Bowl
Every Sticky Miso Salmon Bowl starts with a handful of ingredients that balance sweet, salty, and tangy flavors. Each one has a purpose, from the creamy miso base to the fresh toppings that add crunch and color. Once you see how simple it is, you’ll understand why this dish is a weeknight favorite.
Glaze Ingredients and Their Purpose:
- White miso (3 tablespoons): Adds deep, savory flavor that anchors the glaze.
- Honey (2 tablespoons): Creates a sticky sweetness and caramelized texture.
- Vegetable oil (1 tablespoon): Helps the glaze coat the salmon evenly.
- Fresh ginger (1 tablespoon): Adds warmth and aroma to balance the miso.
- Grapefruit zest (2 teaspoons) and juice (1 tablespoon): Brightens every bite with acidity and freshness.
For the Salmon and Rice:
- Sushi rice (2 cups): A soft, slightly sticky base that holds the bowl together.
- Salmon fillets (4 pieces, about 6–8 ounces each): Choose skinless and pat them dry before coating.
- Salt and pepper: A light seasoning keeps the glaze balanced.
- Unsalted butter (1 tablespoon): Stirred into the rice for richness.
- Scallions (4, thinly sliced): Add freshness and color to the final dish.
Toppings and Extras:
- Kimchi or chili crisp: Adds heat and tang.
- Toasted nori sheets: A touch of crunch and umami.
- Cucumber, avocado, or radish slices: Fresh and cool against the warm salmon.
Each ingredient builds a layer of contrast—creamy, crispy, warm, and bright. Together, they create the balance that makes this bowl unforgettable. For a rich alternative, you can try my version of miso butter salmon, which uses the same flavor base with an extra layer of silky texture.
How to Cook the Sticky Miso Salmon Bowl
Cooking the Sticky Miso Salmon Bowl is easier than it looks. The process happens in layers, and once you’ve done it once, it becomes second nature. The goal is to keep each step simple so the flavors build naturally from the rice to the glaze.
Step-by-Step Cooking Guide:
Prepare the rice.
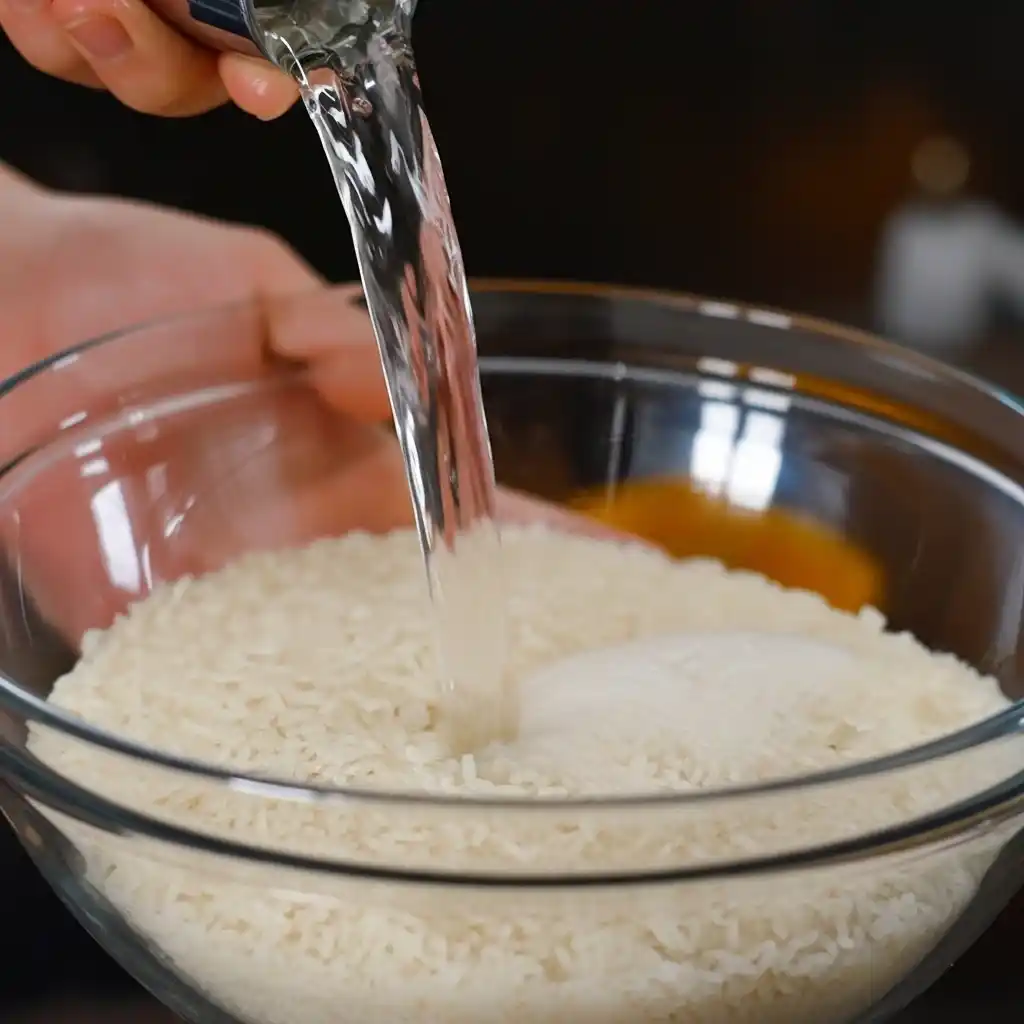
Rinse the sushi rice until the water runs almost clear. Cook it in 2¼ cups of water, then let it rest, covered, for 10 minutes to steam.
Make the glaze.
In a bowl, whisk the miso, honey, vegetable oil, fresh ginger, and grapefruit zest and juice until smooth.
Coat the salmon.
Season each fillet lightly with salt and pepper. Place them in the glaze and toss gently to coat every side. Let the fish marinate while the rice finishes cooking.
Broil to perfection.
Line a baking sheet with foil. Arrange the fillets and spread the remaining glaze on top. Broil them about 5 inches from the heat source for 5 to 7 minutes, until the tops look glossy and slightly charred.
Finish the rice.
Stir the butter and scallions into the warm rice. Add salt and pepper, then fluff it with a spatula until it turns silky and fragrant.

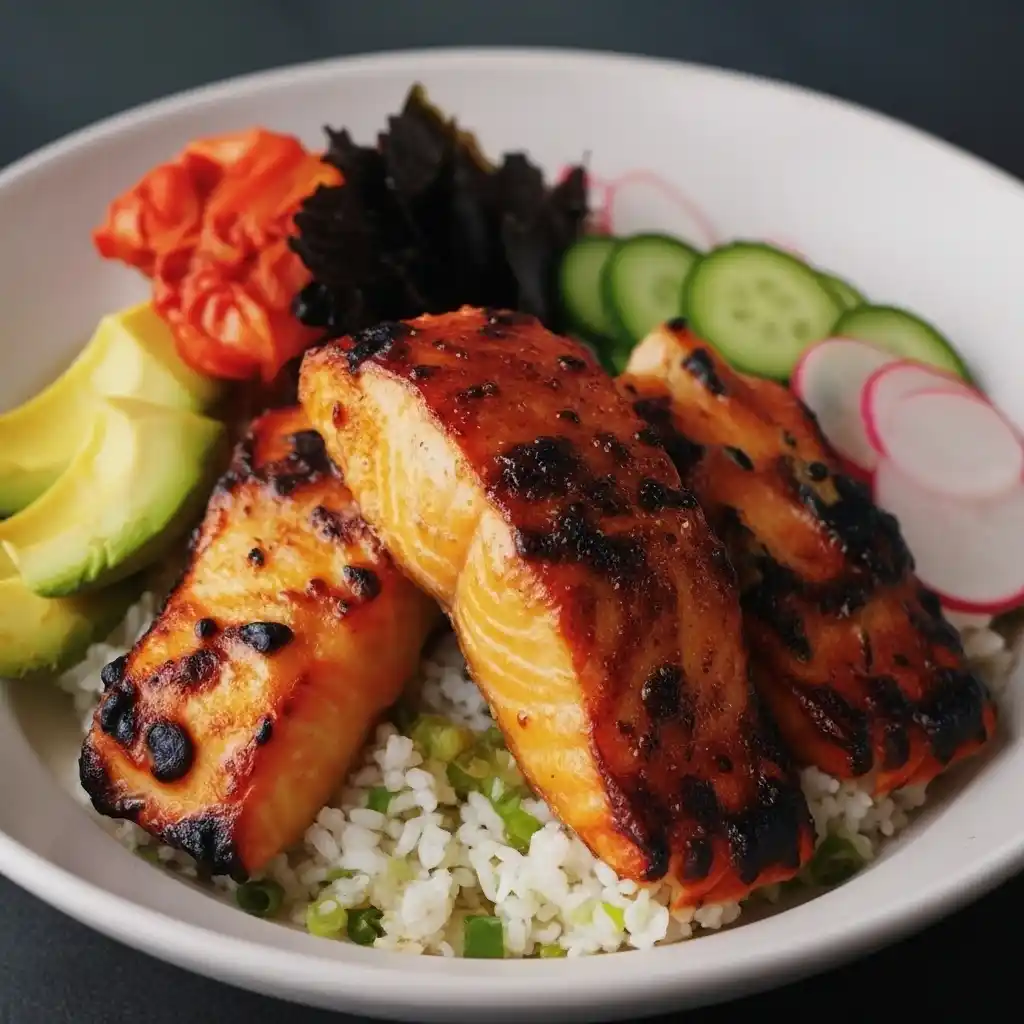
Assemble the bowls.
Spoon the rice into a bowl, top it with the sticky salmon, and finish with toppings such as avocado, kimchi, chili crisp, or cucumber slices.
The glaze thickens beautifully as it cools, coating each piece of salmon in a sweet and savory layer. For days when you want the same flavor with less cleanup, try my quick air fryer miso salmon. It delivers that same sticky texture in half the time.
Variations, Prep, and Serving Ideas for Sticky Miso Salmon Bowl
One of the best parts about the Sticky Miso Salmon Bowl is how easily it adapts to your kitchen and your cravings. Once you know the base recipe, you can switch flavors, proteins, or toppings to create new versions without losing that signature glaze.
Easy Flavor and Ingredient Swaps:
- Citrus changes everything. Replace grapefruit with lime or orange juice for a softer or sweeter finish.
- Swap the sweetener. Use maple syrup or agave for a deeper, earthy glaze.
- Try a different protein. Substitute salmon with tofu, shrimp, or cod for the same sticky texture.
- Add heat or crunch. Mix in chili crisp, sesame seeds, or crushed peanuts to elevate each bite.
- Change the base. Use brown rice, quinoa, or cauliflower rice to make it lighter or grain-free.
Make-Ahead, Storage, and Reheating Tips:
- Prep in advance. Whisk the glaze a day ahead and keep it in the fridge.
- Store properly. Leftover salmon and rice last up to 3 days in an airtight container.
- Reheat gently. Warm in the oven or microwave with a splash of water to keep the glaze soft.
- Meal prep trick. Divide portions into bowls so they are ready for quick lunches or dinners.
This recipe fits any schedule, whether you are cooking for a busy weeknight or planning a cozy weekend dinner. If you enjoy restaurant-style flavors at home, you might also like my Cheesecake Factory miso salmon version, which offers a similar richness with a touch of sweetness.
Sticky Miso Salmon Bowl Questions Answered
What is a Sticky Miso Salmon Bowl made of?
It’s made with white miso, honey, ginger, and grapefruit to create a sweet, savory glaze that coats tender salmon. The bowl includes buttery sushi rice, scallions, and toppings like avocado or cucumber for balance.
Can I make Sticky Miso Salmon Bowl ahead of time?
Yes. You can mix the glaze a day ahead and refrigerate it. For best texture, cook the salmon and rice just before serving, then warm them gently if needed.
What can I use instead of grapefruit in the glaze?
Lime, orange, or yuzu juice work perfectly. Each adds a slightly different brightness while keeping the glaze balanced and flavorful.
How do I keep the salmon from drying out when reheating?
Warm it slowly with a small splash of water or broth. Cover the salmon loosely so the glaze stays glossy and the texture moist.
Can I make this recipe with another protein?
Yes. Tofu, shrimp, or cod all work beautifully with the same miso glaze. Keep an eye on cooking time so the glaze thickens without burning.
What toppings go best with Sticky Miso Salmon Bowl?
Fresh toppings like kimchi, avocado, cucumber, or radish add crunch and color. A drizzle of chili crisp or a sprinkle of sesame seeds makes it even better.
Is Sticky Miso Salmon Bowl healthy?
Yes. It’s high in protein, rich in omega-3s, and naturally balanced with whole grains and fresh vegetables. You can make it lighter by using brown rice or skipping the butter.
Sticky Miso Salmon Bowl brings together everything I love about home cooking—simple ingredients, bold flavor, and the joy of sharing food. The sticky miso glaze, buttery rice, and bright toppings turn a weeknight into something memorable. Once you make it, you’ll find yourself coming back to it again and again. It’s comfort food that still feels light and fresh. For another recipe with that same cozy energy, try my miso salmon recipe Nobu-style for a restaurant-quality dinner made right at home.